The other day I was at a school board meeting sitting in the audience with other parents and friends as several parents stepped up to the podium to voice their opinions about the topic of the day, which happened to be the creation of an advanced science class at the middle school. As each of these parents stepped up to the mic they stated their name and often followed that with a title or pedigree or other qualification that they believed would give their statements more weight or clout. Several had Doctor in front of their names and one was even a neuroscientist. I hadn't really planned to make a statement and had attended the meeting simply to add more faces to the 'pro' side of the argument, but as I listened to these parents I mentally rehearsed what I would say if I were to stand in front of the crowd and list off my title or pedigree or qualifications. What makes me an important person? What gives my opinions and statements weight? What benchmarks of success have I achieved? Do I really have any qualifications now, or have my years of being 'just' a mom robbed me of what once made me a powerful person with opinions that should be listened to and respected?
Once upon a time I had a very impressive resume. I'm an MIT graduate with a bachelors degree in Earth, Atmospheric and Planetary Science. For my thesis project I worked alongside the man who discovered the rings of Uranus. After college I worked as a Software Consultant in the Boston area then moved to Seattle to be a software developer for a small startup in downtown. The work I did in that startup led me to become a co-founder in another startup based around code I wrote. The entire company was based on code I wrote! I was a VP at age 23 in my own dot-com startup for goodness sake! Yes, I know, in the late '90s dot-com startups were a dime a dozen, but looking back on it, I still feel that was a pretty impressive feat. As often happened in those days, one thing led to another, and over the course of a few years the Venture Capitol vultures had gained control of the company. The work wasn't really any fun anymore. So when my first child was born pre-mature, I took that as a sign that my dot-com-founder days should be put behind me, and I jumped head first into the world of mommy-dom.
Let me just pause here and say that I LOVE being a stay at home mom. I love that I was there for all of the incredible moments that make up a child's first years. I saw every smile, every step, every accomplishment and I wouldn't give those up for anything. I was the primary person who got to shape my children, mold them into the tiny humans they are today. I am proud of my kids and how they are empathetic, caring, hard working and shockingly witty, and I'm ecstatic that I get to take credit for some of that. A great woman I know once said to me "I became a parent because I wanted to parent.". I'm with her 100% there. I wanted to be the person to raise my kids. I didn't want to turn them over to another person for most of the waking hours of the day. I selfishly didn't want to miss all of it. I wanted to be a part of the show and have the memories of it to reflect on when I'm old and have that inevitable empty nest.
On top of all of that, I'm lucky enough to have a husband and co-parent who is compensated enough for his work outside the home to pay all of our bills. In my eyes, he's made the greater sacrifice in agreeing to miss all of those precious childhood moments in exchange for money. I try to record as much of our kids' life as possible in photos and videos for him to relive, but if it were me in his shoes I'd spend a good deal of my workday in tears knowing I was missing the show. He is a stronger person than I in that regard.
Over the course of my kids' childhood, in addition to the household management, scheduling and maintenance, I've had various part time jobs that have allowed me to work from home on mommy time. I've done consulting work writing code, started a cottage food business baking paleo treats with a friend, and most recently writing cookbooks and children's books with my kids. These have all given me a sense of professional accomplishment, but none feel very resume worthy when compared to what I did pre-kids.
So, when someone asks me what I do, I'm never sure how to answer. When I was in the working world, I had an answer. If I was a full-time working mom now I'd answer with the title I held at my paying job, but saying I'm a stay at home mom doesn't seem to have the weight that the actual job of stay at home mom entails. I've seen various internet jokes where a mom is required to list her occupation and she writes something like 'CEO of child development and education, head chef, grounds keeper, chief sanitation engineer, head nurse and chauffeur'. Those are all true, but when you list out all of the duties, it sounds like your trying too hard to say how important your job really is. Saying you're CEO of a company or putting an MD or PhD after your name automatically gives you clout regardless of really how important your job is or how vital you are at your workplace.
If I ask my 'employees' if they could survive without me, the answer is no. For many years of my job as a SAHM I literally held the lives of my 'employees' in the palm of my hand. So, how vital was my role? In my heart I know that being a SAHM is just as important a job as any doctor's, lawyer's, or CEO's, but when someone asks 'What do you do?' it often doesn't feel that way. I sometimes feel like I have to follow up my answer that I'm a stay at home mom with what I used to do before kids, just to prove I am smart and capable and worthwhile. In my head I think if they know that I graduated from MIT and started my own dot-com and wrote code, then they'll treat me like the smart person I am rather than someone who wipes noses for a living. Sometimes if I'm talking to a person with an out of the home career they do seem to treat me differently if they know I used to have a 'real' job. Why is that? Is the fact that I care for my home and family full time proof that I can't do something more 'important'? No, no it's not.
If success is measured in happiness rather than titles and money, then I think I'm currently a great success at my job and life. I'm much happier now being CEO of my home, volunteering at my kids' school, being a co-leader of my daughter's girl scout troop and writing books with my kids than I ever was being VP at a software company. I know in my heart that someone else can write that code or lead that company just as well as I can, but no one else can raise my kids the way I do. So, this is where I'm needed right now, and this is where I plan to stay. I just need to work on a better job title; maybe I should say I'm retired from the office world and am now spending my days doing what I choose to do...who wouldn't want to have that job?
Showing posts with label kids. Show all posts
Showing posts with label kids. Show all posts
Friday, March 28, 2014


Wednesday, February 19, 2014
LEGO Stop Motion Movie
The family went to see the LEGO Movie the other day and though it was one of the best we'd seen in a while. To celebrate, The Boy decided to make his own stop motion LEGO movie starring 2 ninjas who stab and decapitate each other. :) He's a boy...what can I say.
Saturday, October 19, 2013
Healthy Immune Boosting Gummies
I saw a post a while back about making your own gummies. My kids love gummy fruit and such, but I don't usually buy them because of the sugar content. Then I saw where the Real Food RN posted a recipe for gummies that would fight colds and flu. Why not make gummies that have a purpose as well as taste good? So I looked over her recipe and then altered it to fit what my kids and I like and what I had on hand. So far, I'm having to hide them to keep the kids from eating them all in one sitting. So I think that's a hit!
I made my gummies using Elderberry Syrup, Gelatin, Pomegranate juice, honey and cinnamon. I bought my Elderberry Syrup from Vitacost ready made rather than making it myself, but I may make my own in the future. I purchased my gelatin from Amazon.
Elderberries have a number of health benefits:
My only issue with the gummies is they didn't want to release from the molds very well. When I make them again I may spray the molds with coconut oil or I may make them in a tray lined with parchment. Have fun making your own Immune boosting gummies!

Immune Boosting Elderberry and Pomegranate Gummies
1 1/4 cup Pomegranate Juice
4 Tbsp. gelatin
1/4 cup Elderberry syrup (use pre-made or make your own)
1/4 honey
2 tsp. cinnamon
In a small saucepan, heat the Pomegranate juice until just bubbly. Place gelatin in a mixing bowl then pour hot juice onto it. Stir until dissolved. Add all other ingredients to the hot mixture and stir until well combined. Carefully place mixture into candy molds then refrigerate for at least an hour. (You may want to spray molds with coconut oil...I didn't try this, but I think it might help them release better.)

I made my gummies using Elderberry Syrup, Gelatin, Pomegranate juice, honey and cinnamon. I bought my Elderberry Syrup from Vitacost ready made rather than making it myself, but I may make my own in the future. I purchased my gelatin from Amazon.
Elderberries have a number of health benefits:
Used for its antioxidant activity, to lower cholesterol, improve vision, boost the immune system, improve heart health and for coughs, colds, flu, bacterial and viral infections and tonsillitis. Elderberry juice was used to treat a flu epidemic in Panama in 1995.
My only issue with the gummies is they didn't want to release from the molds very well. When I make them again I may spray the molds with coconut oil or I may make them in a tray lined with parchment. Have fun making your own Immune boosting gummies!

Immune Boosting Elderberry and Pomegranate Gummies
In a small saucepan, heat the Pomegranate juice until just bubbly. Place gelatin in a mixing bowl then pour hot juice onto it. Stir until dissolved. Add all other ingredients to the hot mixture and stir until well combined. Carefully place mixture into candy molds then refrigerate for at least an hour. (You may want to spray molds with coconut oil...I didn't try this, but I think it might help them release better.)

More info from the SavoryLotus on why you should add gelatin to your diet:
- Gelatin is loaded with protein ~ With 6 grams of protein per tablespoon, it’s a great way to add more protein to your diet. Even though it is not a complete protein, it helps the body fully utilize the complete proteins that are taken in.
- Gelatin improves digestion ~ It naturally binds to water and helps food move through the digestive tract more easily.
- Gelatin can help heal food allergies and intolerances ~ Adding gelatin to your diet can heal the lining of your stomach and digestive tract. And since food allergies/intolerances are thought to come from a “leaky gut,” the idea is that when you heal your digestive tract, you no longer have proteins and toxins that create health issues “leaching” into your body.
- Gelatin is good for bone and joint health ~ Gelatin contains lots of amino acids important in helping to prevent the weakness and degeneration of cartilage in joints. Gelatin, with it’s anti-inflammatory properties, has also been shown to reduce the pain and inflammation of arthritis.
- Gelatin helps your body release toxins ~ Glycine, an amino acid found in gelatin, assists the liver to efficiently remove toxins from our system.
- Gelatin gives you better hair, nails, and teeth ~ Gelatin contains keratin, which is a very strong protein found in your hair, nails, teeth and skin.
- Gelatin improves the elasticity of your skin ~ Gelatin is essentially cooked down collagen. Consuming it will help improve the look and feel of your skin much more effectively then hard- to- absorb collagen facial creams. Gelatin actually stimulates your body to produce more collagen.
- Gelatin helps speed up wound healing ~ One of the amino acids found in gelatin is glycine, which is highly anti-inflammatory.
- Gelatin can improve your quality of sleep ~ Clinical studies have shown that not only do people sleep better when consuming the amino acid glycine, they report less daytime drowsiness and better cognitive function.
- Gelatin can help with weight loss ~ Gelatin is thought to increase the production of Human Growth Hormone and to boost metabolism. And with it’s nutrient-dense content, it also helps with satiety (keeps you full.)
Wednesday, October 2, 2013
Swirly Sugar Cookies by the Smaller Cavegirl
Last week The Girl wanted to make some cookies from her kid cookbook, but she wanted to alter them to make them gluten and dairy free. The original recipe called for butter and wheat flour, so we substituted coconut oil and almond flour for those. It also called for lemon zest, which we didn't have. So we substituted lemon juice for that one. And she wanted to add cinnamon to her recipe because she likes cinnamon. :) When all was said and done we had a recipe that loosely resembled the original, but followed the rules she'd set for herself and were very tasty. Win!

Swirly Sugar Cookies - Gluten free, Dairy Free
To make about 20 cookies, you will need:
1 cup powdered sugar (or blitz 1 C granulated sugar in a blender till powdered)
10 Tbs. coconut oil
2 Tbs. lemon juice
1 3/4 Cup almond flour
1 Tbs. cinnamon
Few drops food coloring
Parchment or Silpat lined cookie sheets


Swirly Sugar Cookies - Gluten free, Dairy Free
To make about 20 cookies, you will need:
1 cup powdered sugar (or blitz 1 C granulated sugar in a blender till powdered)
10 Tbs. coconut oil
2 Tbs. lemon juice
1 3/4 Cup almond flour
1 Tbs. cinnamon
Few drops food coloring
Parchment or Silpat lined cookie sheets
Whisk
powdered sugar, cinnamon and almond flour together in a bowl. Melt coconut oil
then add to dry mixture. Stir in lemon juice. Mix until well combined adding
more flour or powdered sugar if mixture is too runny. Batter should be the
consistency of tooth paste. Divide dough into 2 bowls. In one bowl add a few
drops of food coloring until you reach the desired color. Mix food coloring
into dough. On parchment or plastic wrap roll out the uncolored dough until it
is about ¼ inch thick. Carefully spread out the colored dough on top of the
uncolored dough. Carefully roll up the dough making a log with the colors
swirled on the inside. Wrap log in plastic or parchment and refrigerate for
about ½ hour. Preheat oven to 350*F and
remove log from refrigerator.

Slice dough into ¼ inch thick rounds and place
onto a parchment or Silpat lined cookie sheet. Cookies
will spread quite a bit!

Bake for about 13-15 minutes until edges are lightly browned.

Tuesday, October 1, 2013
Week 3 & 4 of the Kids' School Lunches
The kids branched out a little bit in their school lunches these past couple of weeks. The boy started taking Salmon Salad (mix 1 can of salmon with about 2 Tbs. paleo mayo and 2 tsp. mustard) as his protein and the girl made herself some gluten and dairy free cookies (she typed up the recipe, so I'll be posting that soon). They aren't Paleo or primal as they use powdered sugar (you can make your own without corn starch but it's still sugar).
The Boy is sticking to the gluten and dairy thing pretty well and will deny himself even if I say he can have something on occasion (he seems to be an all or nothing kind of kid). The Girl has been more reluctant. I've told her it's all her choice and she can eat as she sees fit (to a degree). If she wants to eat gluten and dairy, then I'm not going to say anything about it. I'd say she's holding firm at about 70/30. Overall they are still pretty happy with their lunches and so am I.
The pictures below are some of the lunches I managed to photograph...some got whisked out the door to school before I could snap my pics.


The Boy is sticking to the gluten and dairy thing pretty well and will deny himself even if I say he can have something on occasion (he seems to be an all or nothing kind of kid). The Girl has been more reluctant. I've told her it's all her choice and she can eat as she sees fit (to a degree). If she wants to eat gluten and dairy, then I'm not going to say anything about it. I'd say she's holding firm at about 70/30. Overall they are still pretty happy with their lunches and so am I.
The pictures below are some of the lunches I managed to photograph...some got whisked out the door to school before I could snap my pics.


The Boy: Salmon Salad, frozen strawberries, lettuce and choc chip muffin
The Girl: Prosciutto, lettuce, frozen strawberries and a banana


The boy: salmon salad, lettuce, pears, choc chip muffin
The girl: pastrami, carrots, apples, choc chip muffin


The girl: ham(hidden under the carrots), carrots, pears, cookie
The boy: salmon salad, lettuce, frozen strawberries (they melted and leaked so they got a bag this time), choc chip muffin
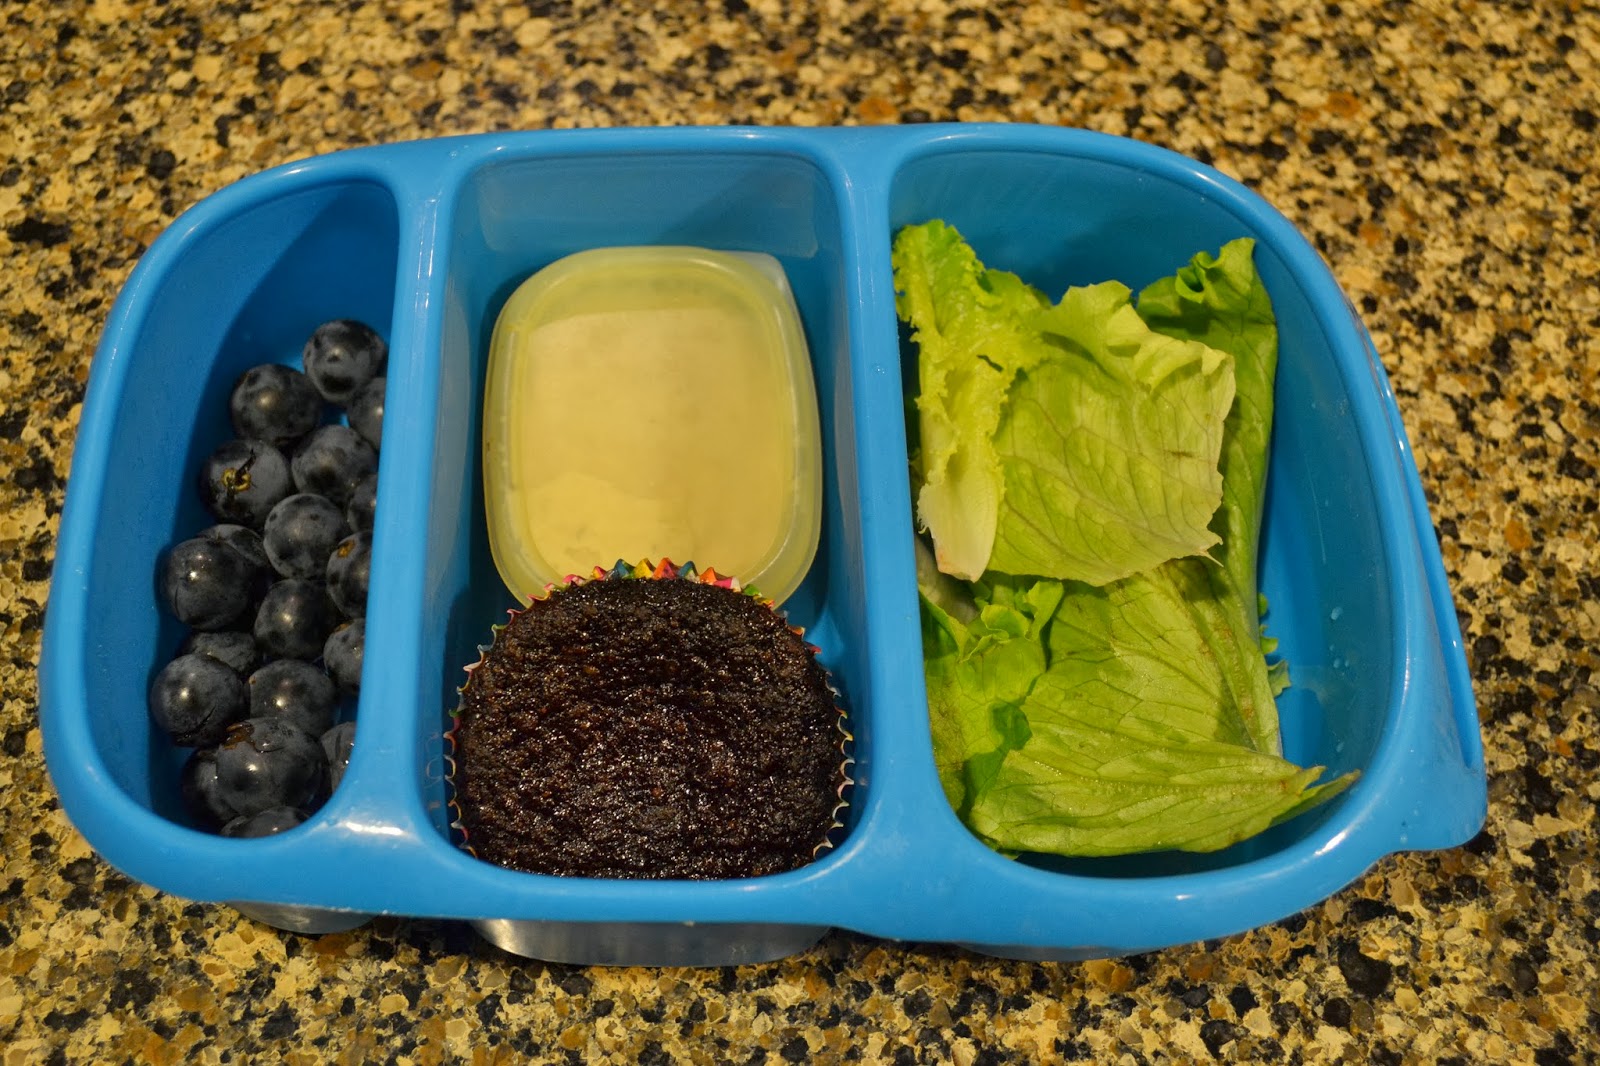

The boy: salmon salad, lettuce, grapes, choc chip muffin
The girl: turkey (under carrots), carrots, pears, cookie


The boy: salmon salad, pears, lettuce, grapes, choc chip muffin
The Girl: ham, carrots, hummus, pears, cookie


The boy: salmon salad, apples, lettuce, choc chip muffin
The girl: ham, carrots, apples, hummus, cookie

The boy: frozen strawberries, salmon salad, kale chips, choc chip muffin
The girl: got out the door before I could take a picture. I think she had ham, carrots, choc chip muffin, banana and dried peaches.
Monday, September 16, 2013
Another Week of the Kids' School Lunches
A lot of the kids' lunches are repeats from previous days, but as the seasons change I know that the fruit and veggies will probably change with it. They are still packing their lunch on their own each night for the next day, which is a big time saver in the morning and a stress reducer for me. So, it's working for us quite well!
What do your kids put in their lunch boxes?


What do your kids put in their lunch boxes?


The boy: sliced turkey, lettuce, banana and a choc chip muffin
The girl: prosciutto, carrots, banana and a choc chip muffin (she left her lunch box at school and had to us a substitute)


The boy: Canadian bacon, nectarines, lettuce and a choc chip muffin
The girl: Canadian bacon, apples, carrots and a choc chip muffin


the boy: pastrami, nectarines, lettuce and a choc chip muffin
the girl: prosciutto, nectarines, carrots and a choc chip muffin


The boy: pastrami, carrots, red grapefruit (in grape juice) and a choc chip muffin (he took a bite out of it!)
The girl: hummus, carrots, nectarines and kettle chips (not my favorite lunch for her, but I'm being flexible as long as most of the lunch is good)
Monday, September 9, 2013
The Kids' Lunches for the First Week of School
I think the kids did pretty well for the first week of school. They each picked a protein, veggie, fruit and treat for each day and then ate almost all of the food every day. That's a win in my book! Their lunch boxes look very similar from day to day, but as the season's change their fruits and veggies will most likely change as well. I can see apples on the horizon as the fruit of choice in a week or so!


Day 1:
The Boy: Pastrami, nectarines, lettuce and a Chocolate Chip Muffin
The Girl: Pastrami, Pickles, Banana and Blueberry Muffin

Day 2
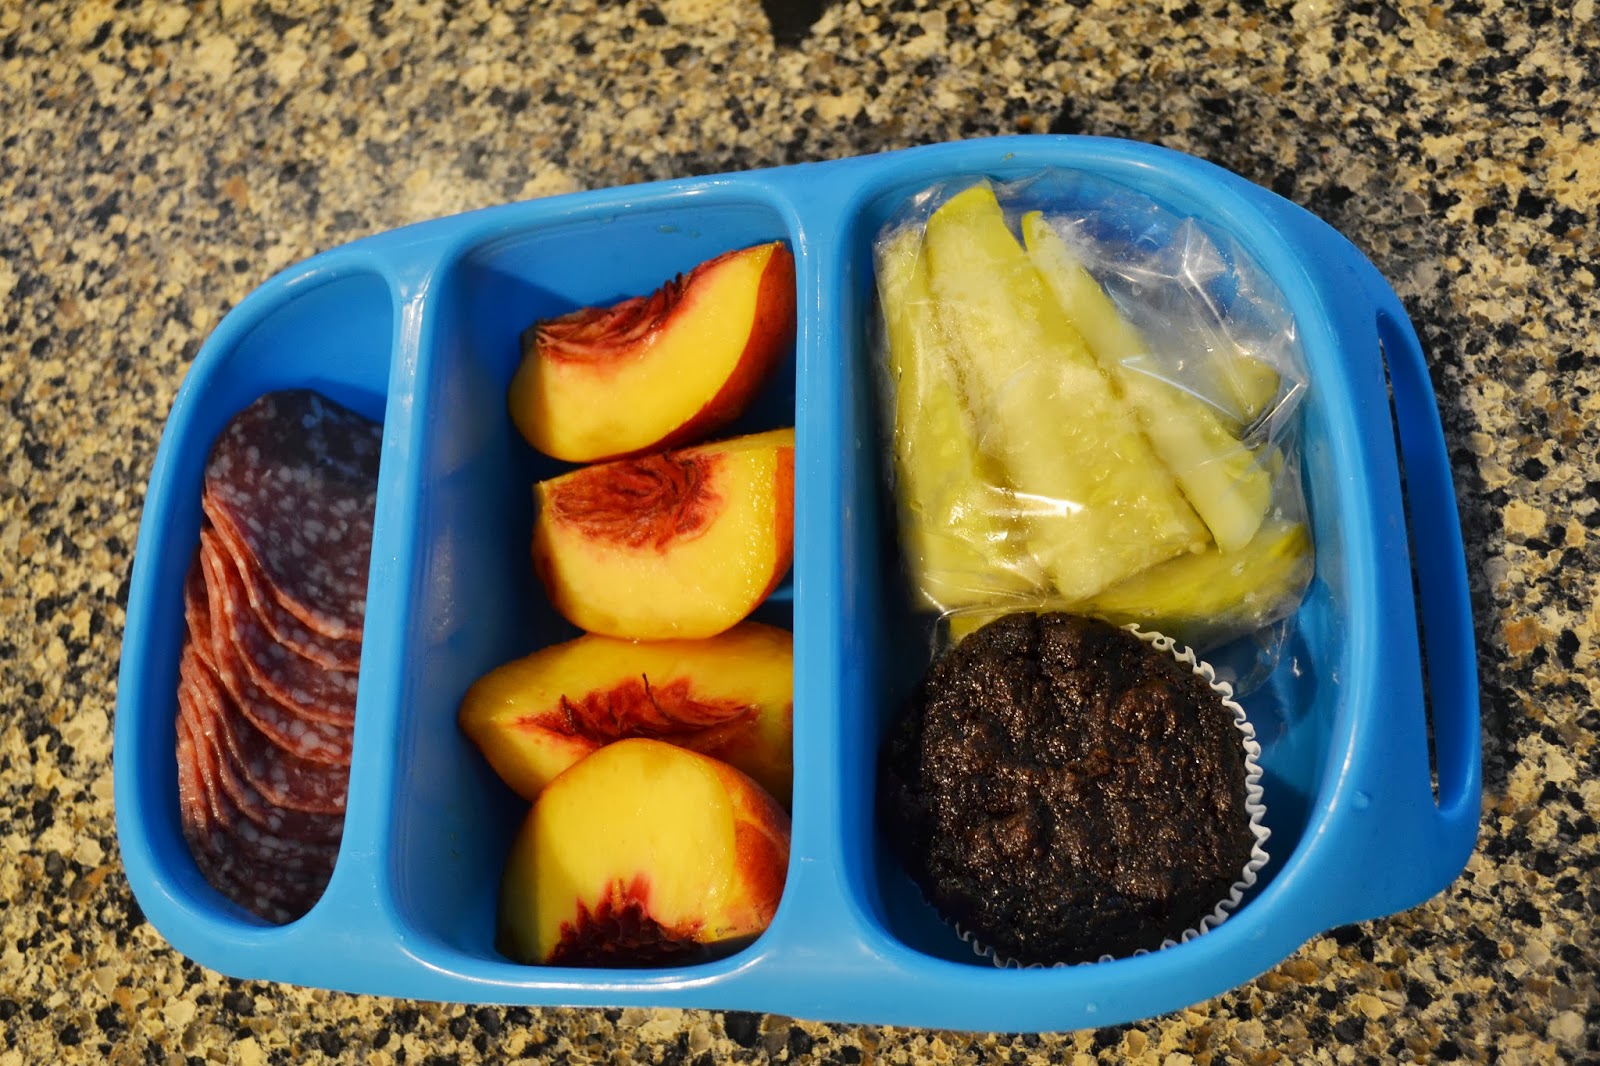
The Boy: Turkey, melon, zucchini and chocolate chip muffin
The Girl: Salami, Nectarines, pickles and chocolate chip muffin


Day 3
The Boy: Turkey, Melon, Chocolate chip muffin, Seaweed
The Girl: Salami, melon, chocolate chip muffin, Seaweed


Day 4
The Boy: Pastrami, melon, lettuce, chocolate chip muffin
The Girl (left her lunch box at school): Pastrami, carrots, nectarines, chocolate chip muffin


Day 5
The Boy: Pastrami, Nectarines, Lettuce, chocolate chip muffin
The Girl: Prosciutto, carrots, chocolate chip muffin, nectarines
Monday, September 2, 2013
Back to School Lunches and Breakfasts for my Cavekids
Tomorrow the kids go back to school! I can't believe I have a third grader and a fifth grader, but somehow it happened. The kids have decided to try to be 100% dairy and gluten free (yay!). So we have been working on how to make that happen. Even though I eat Paleo, it's not as easy to find things for the kids to take for lunch that fit into that category. I'll eat practically any vegetable, meat or fruit, but they are much more picky. The boy also doesn't really like cold meat, so we're working on ways to keep his meat warm or find meats he will eat cold.
As we start the school year, we're focusing on things I know they like and will try to add in other more adventurous items as the year progresses. So far in my preparations I've made a big batch of coconut flour chocolate pancakes to put in the freezer. Both kids like pancakes and can pop these babies in the toaster every morning to make their own breakfast. Add some precooked bacon and almond milk to that and they are set! Next week we may make some bacon and egg cups or pizza cups to have on hand for breakfast, but for now we're sticking to pancakes.
I also baked a big batch of chocolate chip muffins to put in the freezer. Instead of the applesauce I usually use in the recipe, I substituted zucchini puree. That way even if he doesn't eat the vegetables in his lunch box he's gotten zucchini anyway. I also brought home a few blueberry muffins from our Farmer's Market Stall the other day just to give them some variety.
The kids will be packing their own lunches every night before they go to bed...at least that's the plan. I made a chart for them to consult when deciding what to pack. It's got 4 categories to choose from, and they should pick one item from each category. The 4 categories are: Protein, Veggie, Fruit, Treat. If they want an extra serving of one of the other 3, they can always leave out the Treat category, although I don't really anticipate that happening. In making this chart I asked the kids what they liked and listed those items. I figure if they both dislike turnips, there's no point putting that on the chart, right? So this is our chart so far...I'm sure we'll add more items as the year progresses and probably ditch ones that don't go over well.
Protein:
Boiled Eggs
Bacon and Egg Cup
Prosciutto
Jerky
Salami
Pastrami
Sliced Turkey
Ham Cubes
Meatballs
Chicken Legs
Salt and Vinegar Almonds - recipe to come!
Veggie:
Carrots
Pickles
Cucumbers
Lettuce
Spinach
Kale Chips - planning try out another recipe using the dehydrator
Fruit:
Banana - fresh or dehydrated
Apple
Applesauce
Nectarine
Peaches
Pears
Melon
Strawberries - fresh or frozen
Orange
Blueberries - fresh or frozen
Treat:
Chocolate Chip Muffin
Blueberry Muffin
Everyday Cookie
Smoothie in a Thermos
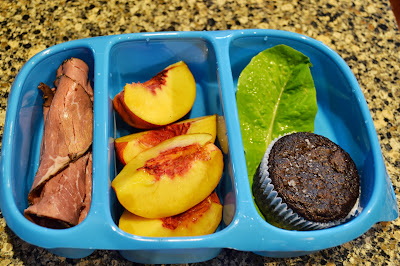
Here is what the kids packed for the first day of school. The girl chose pastrami, pickles, a banana and a blueberry muffin.

The boy chose pastrami, a nectarine, few pieces of romaine lettuce and a chocolate chip muffin.
I'm anxious to see what gets eaten and what gets brought back home!
As we start the school year, we're focusing on things I know they like and will try to add in other more adventurous items as the year progresses. So far in my preparations I've made a big batch of coconut flour chocolate pancakes to put in the freezer. Both kids like pancakes and can pop these babies in the toaster every morning to make their own breakfast. Add some precooked bacon and almond milk to that and they are set! Next week we may make some bacon and egg cups or pizza cups to have on hand for breakfast, but for now we're sticking to pancakes.
I also baked a big batch of chocolate chip muffins to put in the freezer. Instead of the applesauce I usually use in the recipe, I substituted zucchini puree. That way even if he doesn't eat the vegetables in his lunch box he's gotten zucchini anyway. I also brought home a few blueberry muffins from our Farmer's Market Stall the other day just to give them some variety.
The kids will be packing their own lunches every night before they go to bed...at least that's the plan. I made a chart for them to consult when deciding what to pack. It's got 4 categories to choose from, and they should pick one item from each category. The 4 categories are: Protein, Veggie, Fruit, Treat. If they want an extra serving of one of the other 3, they can always leave out the Treat category, although I don't really anticipate that happening. In making this chart I asked the kids what they liked and listed those items. I figure if they both dislike turnips, there's no point putting that on the chart, right? So this is our chart so far...I'm sure we'll add more items as the year progresses and probably ditch ones that don't go over well.
Protein:
Boiled Eggs
Bacon and Egg Cup
Prosciutto
Jerky
Salami
Pastrami
Sliced Turkey
Ham Cubes
Meatballs
Chicken Legs
Salt and Vinegar Almonds - recipe to come!
Veggie:
Carrots
Pickles
Cucumbers
Lettuce
Spinach
Kale Chips - planning try out another recipe using the dehydrator
Fruit:
Banana - fresh or dehydrated
Apple
Applesauce
Nectarine
Peaches
Pears
Melon
Strawberries - fresh or frozen
Orange
Blueberries - fresh or frozen
Treat:
Chocolate Chip Muffin
Blueberry Muffin
Everyday Cookie
Smoothie in a Thermos
Here is what the kids packed for the first day of school. The girl chose pastrami, pickles, a banana and a blueberry muffin.
The boy chose pastrami, a nectarine, few pieces of romaine lettuce and a chocolate chip muffin.
I'm anxious to see what gets eaten and what gets brought back home!
Friday, June 14, 2013
Paleo Camping Menu
Through Girl Scouts and Boy Scouts my family has really gotten into camping this past year. We love being outside without all of the distractions of electronic devices and to-do lists that always seem to take precedence when we're at home. We're also aspiring survivalists and are always looking into how to do things in a more primitive way without all of the "right" equipment. Camping fulfills all of those criteria, and it's just plain fun.
One of the minor obstacles I've run into while planning a camping trip is coming up with a paleo and kid-friendly menu that can be prepared over a campfire, camp stove or charcoal. The last camping trip we went on with some other Girl Scout families really allowed me to hone the Paleo camping menu with the help of some other gluten-free parents. I believe the menu we settled on is a very do-able, kid-friendly, allergy friendly Paleo menu that we'll probably use again when the need arises.
We arrived at the campsite on Friday evening and stayed through Sunday mid morning. So, we needed 2 breakfasts, 1 lunch, 1 dinner and 1 evening snack (for Friday night campfire). This is what we ate on our trip.
Friday evening
Banana Boats - Banana filled with dairy free chocolate chips, wrapped in foil and warmed in the coals of the campfire

Saturday
Breakfast
Omelets in a bag - Fill zip lock bag with eggs, veggies, meats, cheese, then seal and drop into boiling water to cook. When egg pulls away from bag, it's cooked.
Sausage cooked over a camp stove
Fruit salad
Coffee cake cooked in the Dutch oven with charcoal briquettes
Lunch
Make your own sandwich or salad - variety of meat, cheese, veggies
Left over fruit salad
Dinner
Sausage or hot dogs cooked on sticks over the fire - wrapped in romaine leaves instead of a bun
Trout caught that day - wrapped in foil with some salt, pepper and olive oil then cooked in the coals
Sweet Potatoes - wrapped in foil and cooked in coals - served with cinnamon
Pumpkin Cupcakes and chocolate chip cupcakes cooked in box ovens
Sunday
Breakfast
Applesauce Almond Pancakes cooked over a camp stove
sausage cooked over camp stove
left over fruit salad
One of the minor obstacles I've run into while planning a camping trip is coming up with a paleo and kid-friendly menu that can be prepared over a campfire, camp stove or charcoal. The last camping trip we went on with some other Girl Scout families really allowed me to hone the Paleo camping menu with the help of some other gluten-free parents. I believe the menu we settled on is a very do-able, kid-friendly, allergy friendly Paleo menu that we'll probably use again when the need arises.
We arrived at the campsite on Friday evening and stayed through Sunday mid morning. So, we needed 2 breakfasts, 1 lunch, 1 dinner and 1 evening snack (for Friday night campfire). This is what we ate on our trip.
Friday evening
Banana Boats - Banana filled with dairy free chocolate chips, wrapped in foil and warmed in the coals of the campfire

Saturday
Breakfast
Omelets in a bag - Fill zip lock bag with eggs, veggies, meats, cheese, then seal and drop into boiling water to cook. When egg pulls away from bag, it's cooked.
Sausage cooked over a camp stove
Fruit salad
Coffee cake cooked in the Dutch oven with charcoal briquettes
Lunch
Make your own sandwich or salad - variety of meat, cheese, veggies
Left over fruit salad
Dinner
Sausage or hot dogs cooked on sticks over the fire - wrapped in romaine leaves instead of a bun
Trout caught that day - wrapped in foil with some salt, pepper and olive oil then cooked in the coals
Sweet Potatoes - wrapped in foil and cooked in coals - served with cinnamon
Pumpkin Cupcakes and chocolate chip cupcakes cooked in box ovens
Sunday
Breakfast
Applesauce Almond Pancakes cooked over a camp stove
sausage cooked over camp stove
left over fruit salad
Wednesday, June 5, 2013
Pumpkin Cupcakes Made in the Box Oven
This past weekend my family went camping with a few other families, several of which also ate Paleo or similar. On this trip we cooked our food in a variety of ways. We baked coffee cake in the Dutch oven, made pancakes over a camp stove, made omelets in zip lock bags in boiling water, roasted sweet potatoes and more in the campfire coals and baked chocolate chip muffins and pumpkin muffins in box ovens. Box ovens may be my favorite camp cooking method just because it seem amazing to me that you can make an oven that will reach baking temperature using only a cardboard box and aluminum foil. That's kind of crazy, really.
 The pumpkin muffins were a big hit with the adults while the chocolate chip were the kids' favorite. I'm really psyched to try out more flavors in the box oven. Have any requests?

1 small can pumpkin
1 ½ tsp. baking soda
¾ C honey
1 tsp. cloves
2 Tbs. cinnamon
2 tsp. allspice
1/2 tsp. salt
6 eggs
Mix all ingredients in a large bowl. Spoon batter into a lined muffin tin.

If making in a regular oven, Preheat oven to 350F. Bake muffins for about 30 minutes or until they are firm on the top when you press on them.

If making in a box oven, light 9 charcoal briquettes. Using the instructions here, place the muffin tin in the box oven and bake for about 30 minutes or until muffins are firm on top when you press on them. Keep in mind when using a box oven that every time you lift the box up, you will lose 25 degrees F from the oven and will need to add an additional 15 minutes to the cooking time. That's why the nifty window is so nice!


Box Oven Pumpkin Cupcakes
1 ½ C almond flour 1 small can pumpkin
1 ½ tsp. baking soda
¾ C honey
1 tsp. cloves
2 Tbs. cinnamon
2 tsp. allspice
1/2 tsp. salt
6 eggs
Mix all ingredients in a large bowl. Spoon batter into a lined muffin tin.

If making in a regular oven, Preheat oven to 350F. Bake muffins for about 30 minutes or until they are firm on the top when you press on them.

If making in a box oven, light 9 charcoal briquettes. Using the instructions here, place the muffin tin in the box oven and bake for about 30 minutes or until muffins are firm on top when you press on them. Keep in mind when using a box oven that every time you lift the box up, you will lose 25 degrees F from the oven and will need to add an additional 15 minutes to the cooking time. That's why the nifty window is so nice!
Tuesday, June 4, 2013
Cinnamon Coffee Cake in the Dutch Oven
The Girl's Scout troop went camping this past weekend. Their awesome leader wanted to give the girls exposure to multiple camping cooking techniques. Throughout the weekend they learned baking in a Dutch oven, baking in a box oven, roasting in foil over the fire, cooking omelets in zip lock bags in boiling water and cooking pancakes over a camp stove. I was in charge of the morning coffee cake cooked in a Dutch Oven and wanted to make it a tasty Paleo treat. I couldn't seem to find many Paleo camp cooking recipes using a Dutch oven, so I found a few conventional coffee cake recipes and adapted them to Paleo ingredients and the Dutch oven.
Although we made this cake using charcoal briquettes and campfire coals, you could use the same recipe in your oven at home. I didn't get too many good pictures of the results, but everyone seemed to love it and several came back for seconds.

Dutch Oven Paleo Cinnamon Coffee Cake
Cake
1 can of coconut milk
1/2 cup honey
2 tsp. vanilla
4 C almond meal or flour
1 C tapioca flour
2 tsp. cinnamon
1 tsp. baking soda
1 tsp. salt
1/2 C melted coconut oil
1/4 C Honey
 If making in a Camp setting: Spray Dutch oven with coconut oil spray or grease the pan with coconut oil. Mix all cake ingredients together in a large bowl then pour into the Dutch Oven and set aside. Mix all cinnamon ribbon ingredients together in a small bowl then drizzle over cake batter in Dutch oven. Light 6 charcoal briquettes and set Dutch oven on top of charcoal. Light 18 more briquettes and place on top of Dutch oven. Bake for about 30-40 minutes. Test for doneness with knife in center of cake.
If making in a home oven: Preheat oven to 325 degrees. Mix cake ingredients, and pour into a deep pan or 2 round cake pans. Mix cinnamon ribbon ingredients in a small bowl then drizzle over cake batter in pan. Bake 28-30 minutes. Test for doneness with knife in center of cake.
Although we made this cake using charcoal briquettes and campfire coals, you could use the same recipe in your oven at home. I didn't get too many good pictures of the results, but everyone seemed to love it and several came back for seconds.

Dutch Oven Paleo Cinnamon Coffee Cake
Cake
1 can of coconut milk
1/2 cup honey
2 tsp. vanilla
4 C almond meal or flour
1 C tapioca flour
2 tsp. cinnamon
1 tsp. baking soda
1 tsp. salt
Cinnamon Ribbon
4
Tbs. Cinnamon1/2 C melted coconut oil
1/4 C Honey

If making in a home oven: Preheat oven to 325 degrees. Mix cake ingredients, and pour into a deep pan or 2 round cake pans. Mix cinnamon ribbon ingredients in a small bowl then drizzle over cake batter in pan. Bake 28-30 minutes. Test for doneness with knife in center of cake.
Thursday, May 23, 2013
Making Egg Survival Suits
A few weeks ago The Girl had a Girl Scout event where they encouraged the girls to come up with a container that would cushion an egg and allow it to survive a 30 foot drop. Well, both the kids love a challenge like that. So we set to work building Egg Survival Suits.

 The Girl wanted to use popcorn as her cushioning material and found a box to hold it all, but she wanted to make some sort of net/hammock from rubber bands and balloons in the middle to hold the egg and keep it from rattling around in the box of popcorn. She then added a couple of balloons on top and bottom.

The Boy wanted to use mostly balloons for cushion making an orbit of balloons around a small egg carton then added a parachute and a couple of extra balloons to put it over the top.


When they were finished building, we added one of our backyard chicken's eggs then dropped the Survival suits from the top of our tree house.


Both kids' contraptions kept the eggs safe. So we had to drop them again! And both survived the second drop as well, although The Boy lost a balloon in the second round.

The Girl took her Survival suit to the Girl Scout event the next day. Her egg survived through both the 20ft drop and the 30ft drop! She was very excited!
 I love this kind of activity. Both kids used their engineering skills to create something from their imagination, then got to test it in a real world situation...and most importantly of all, they had a blast!


The Boy wanted to use mostly balloons for cushion making an orbit of balloons around a small egg carton then added a parachute and a couple of extra balloons to put it over the top.


When they were finished building, we added one of our backyard chicken's eggs then dropped the Survival suits from the top of our tree house.


Both kids' contraptions kept the eggs safe. So we had to drop them again! And both survived the second drop as well, although The Boy lost a balloon in the second round.

The Girl took her Survival suit to the Girl Scout event the next day. Her egg survived through both the 20ft drop and the 30ft drop! She was very excited!

Subscribe to:
Posts (Atom)
LinkWithin
