Friday, December 31, 2010

Goodbye 2010. Hello 2011

Happy New Year's Eve!


"Be always at war with your vices, at peace with your neighbors, and let each new year find you a better man." – Benjamin Franklin


My family is busy playing Wii Party followed by the movie Bed knobs and Broomsticks (an annual favorite) then a camp out in the living room floor. I'm sure there will be some chocolate eaten in there somewhere, as there should be.

I hope you all have a fun and safe New Year's Eve followed by a Happy and Healthy 2011. May the next year bring you much Happiness!

Thursday, December 30, 2010

Cake Pops

My daughter has always been interested in art, drawing and anything crafty. And as with all kids, she loves candy, cake, ice cream and anything sweet. Lately she's been combining these by taking a cake decorating class and wanting to make her own candy and other crafty food. For Christmas I got her a couple of crafty food books and associated tools and accessories. One of those books was Cake Pops by the Bakarella.com author.

The basic concept of a cake pop or a cake ball involves mixing crumbled cake with pre-made icing then forming the mixture into small balls and chilling or freezing. After freezing you coat the balls with candy melt coating and then decorate.

The first attempt at making these pops didn't go very well. They fell off the stick into the candy and made a general mess. After trying unsuccessfully to make a few, I put the balls back into the freezer to harden up more before trying again. It turns out that for me, a frozen cake ball works much better than a chilled one. Secondly, found that trying to dip the balls into the candy coating also usually resulted in the balls falling off of the stick into the candy. So I improvised by spooning the coating over the balls instead of dipping. That worked much better.


The rest of the project is pure decoration and imagination. Finding the perfect sprinkle to mimic a monkey ear or a chick's foot is all part of the fun. The book gives you a ton of ideas, but I think coming up with our own will be something we try to do as we make more of these. It was a lot of fun once we figured out the technique that worked best for us. And we'll definitely be making more of these in the future!

Wednesday, December 15, 2010

Merry Christmas!


Well, I'm happy to say that this year I finished all of my Christmas shopping, mailing and wrapping a good 2 week before Christmas! But to clarify that, I don't have that many people on my Christmas list. I don't believe in giving people useless things just to have things to give, and most of the people on my Christmas list buy what they want when they want it rather than waiting until Christmas. My adult family members have known for years exactly what they will be getting from me for Christmas. I always make a photo calendar for each person and send it with several prints of photos of my kids and family. I try to get this calendar put together by the end of November and mailed by the first week or so of December. We also make donations to a few of our favorite charities in honor of our family members. Our current favorites are Habitat for Humanity and Heifer International.


So really, my shopping is reserved for the children in my family (my kids and nieces), my hubby and donations to toy drives. I've found that using Amazon.com to organize my shopping ideas works great for me. I search the site and put my ideas into my shopping cart. They'll sit there for a bit while I do more research or think about the items some more. I usually don't buy everything from Amazon, but the shopping cart is a great way to organize my ideas in one place while I look at other places for better prices or better items. This year I was lucky enough to find a Mamapedia Sweet Deal for $100 of AmazonFresh for $50. Turns out Amazon fresh has a lot of the items I was planning to buy from Amazon for the kids. So I got some groceries and some Christmas gifts delivered to my door the next day for half off!


I also, don't really wrap presents. I know the wrapping is a big part of Christmas for a lot of people, but I just can't stand to think of all of the paper waste that results from wrapping everything. So I use reusable cloth bags for our presents. A few years ago I bought some really nice bags from a friend, then found a few more on sale at Joann's after Christmas. If we use all of those and still have presents to wrap, I grab a few pillow cases from the closet, tie some ribbon or a tie around the top of them and we're set! Stocking stuffers still get wrapped in tissue paper, but I guess for now that's good enough.


So all in all, I don't really have a lot to do for Christmas. So it's not too surprising that I've already done it all. But I am really enjoying just sitting back and relaxing for these 2 weeks knowing I'm going to be able to go do fun things with the kids while they are on break and not rushing around to finish Christmas preparations. Merry Christmas to you all!

Did we DS or not?

Well the DS or not discussion lasted a while, but in the end I took the advice of one of my friends who commented on the original post. I asked the kids if they wanted a new electronic device enough to spend their own money to buy it. Both kids have really never spent much of their birthday or Christmas money from grandparents. It's just been sitting in their piggy bank for the last several years. I think they still don't have much of a concept of money and consequently haven't asked to spend it. So when they went to count what they had, both kids had enough (along with a $30 Fred Meyer coupon that was in the paper) to buy the device they wanted.

Son has been a big Nintendo fan for a while and loves Mario and company. So his choice was the new 25th anniversary DSi that comes with a Mario Cart game. After I explained the different devices out there right now, Daughter chose an iPod Touch. I downloaded a bunch of free games and apps for her, and she's in heaven. I think she would have gotten bored with the DS sooner than the iPod, and I think son would have dropped an iPod touch and broken it on day one. So both made good choices for them. And I think having them use their own money was the correct choice as well. I'm still not sure they have a grasp of the concept of money, but I think they felt some pride in being able to use money they've saved to buy something they wanted.

Friday, November 5, 2010

To DS or not to DS

I'm torn right now about whether to get my kids a Nintendo DS for Christmas this year. They have both been asking for one for what seems like forever. A lot of their friends have them; so they've played several games and really enjoyed them. I know it would be a gift they'd love and would play all the time, but there in lies the problem. They would play it ALL THE TIME. I already limit the amount of screen time they get each day, and we have a lot of screens. They play computer games, Wii games, old Nintendo games and Leapster games. Adding another screen then saying "No" when they ask to play it seems unfair. So I can get it for them and let them have unlimited access to it, or get it for them and tell them they can only play it a few minutes each day (which makes the big price tag seem even bigger), or I can not buy it for them at all.

Although I don't want to, I'm letting the fact that most of their friends have one influence my thinking on this. I don't want my kids to think that they get something because "everyone else has one", but there is some social acceptance component that comes into play here. If most of the kids in daughter's circle of friends are talking about something and she can't talk intelligently about it, that will make her feel left out of that social circle. Now, I didn't' have one of everything my friends had growing up and I think I turned out OK. So I'm trying to not let this line of reasoning influence me...but I'm not exactly winning that battle.

The other thing is that with a big price tag, they would only be getting a DS on a major gift-giving occasion like their birthday or Christmas. I also don't really want to get one for one child on a birthday then have to wait 6 months for the other child to get one simply because the fighting it would cause would drive me crazy. I'd like to get them one at the same time, which basically means Christmas. So if I don't get one for them this Christmas, it will have to wait a year until next Christmas before we'll consider it again.

So, I'm torn. Thoughts?

Sunday, October 17, 2010

Cleanse: Day 14 -- The last day!

Day 14:

  • Breakfast: Cleanse friendly pancakes, banana and pure maple syrup
  • Lunch: Amy's lentil soup and WW crackers
  • Dinner: the LAST of the leftover soup and a chicken sausage. For dessert I had a piece of my no sugar banana bread and a drizzle of honey.
The cleanse is over! It really wasn't that hard this time as the eating isn't that much different from what I eat normally. Other than a piece of dark chocolate after dinner and going back to eating that yummy grass fed beef I have in the freezer, we'll probably keep up a very similar way of eating going forward. I think I lost about 3 pounds during these 2 weeks, which is good but a little frustrating when others lost between 7-9 lbs doing the same thing. I guess I'll look at it as a good thing meaning that I'm not regularly putting many toxins or unhealthy things into my body that need to be removed by cleansing. Yeah, I'll look at it that way. :)

Cleanse: Day 13

Day 13:
  • Breakfast: Guess!
  • Lunch: WW wrap with sundried tomato hummus, baby spinach and pico de gallo, leftover chicken leg from last night
  • Dinner: Sushi and green tea

Friday, October 15, 2010

Cleanse: Day 12

Day 12:
  • Breakfast: same old, same old
  • Lunch: WW wrap with hummus, baby spinach and pico de gallo, dessert of dehydrated bananas and cherries, chamomile tea
  • Dinner: Will probably be grilled chicken, corn on the cob, salad and maybe brown rice

Cleanse: Day 11

Day 11:
  • Breakfast: Cheerios, rice milk and banana
  • Rode stationary bike 30 minutes
  • Lunch: Jamba juice all fruit smoothie and chicken veggie wrap (this came with a mango sauce that contained sugar, so I just didn't use it)
  • Dinner: Leftover chicken veggie soup with brown rice crackers and pears

Wednesday, October 13, 2010

Cleanse: Day 10

Day 10:
  • Breakfast: cheerios, rice milk and banana
  • 1 hour of yoga class and 1/2 hour of stationary bike
  • lunch: peanuts and raisins, dried veggie chips, peach green tea
  • 1/2 hour swimming with the kids
  • Dinner: leftover chicken veggie soup from sunday

Tuesday, October 12, 2010

Cleanse: Day 9

Day 9
  • Breakfast: Cheerios, rice milk and banana
  • Lunch: Amy's Lentil soup and a few whole grain crackers, Pseudo Banana Pudding
  • Dinner: Will probably be salmon, some garden veggies sauteed in olive oil with garlic and salt and some whole wheat or brown rice pasta.
  • I'm also planning to take a walk with the kiddos in this nice weather!

Cleanse: Day 8

Day 8:
  • Breakfast: Cheerios, rice milk and banana
  • 1 hour of Yoga
  • Lunch: leftover steel cut oats with some veggie soup poured on top, pseudo banana pudding
  • Dinner: leftover veggie soup from a few days ago

Monday, October 11, 2010

Banana "pudding" ?

I had a sweet craving today and made this spur of the moment banana "pudding" that turned out really good. Thought I'd share.


Banana "pudding"
Ingredients:
1 banana
2 hand fulls of raw almonds (or other nuts)
1/2 C water
1/2 C dried plums (prunes)

Directions:
Mix all ingredients in a blender until smooth, adding more water if necessary to blend.

Sunday, October 10, 2010

Cleanse friendly pancakes


Cleanse Friendly Pancakes
Makes 8 small pancakes

INGREDIENTS
• 1 cup whole grain flour (WW, whole spelt or other whole grain flour should be fine)
• 1 1/2 teaspoons baking powder
• 1/8 teaspoon salt
• 1/2 teaspoon ground cinnamon
• 1/2 teaspoon vanilla extract
• 1 egg
• 1/2 cup water
• 1/2 cup rice milk or other milk alternative
• 1/4 cup chopped nuts (optional)

DIRECTIONS
1. In a medium bowl, stir together the flour, baking powder, salt and cinnamon. Make a well in the center, and pour in the vanilla, water, egg and rice milk. Mix until all of the dry ingredients have been absorbed, then stir in the nuts.
2. Heat a large skillet or griddle iron over medium heat, and coat with cooking spray. Pour about 1/3 cup of batter onto the hot surface, and spread out to 1/4 inch thickness. Cook until bubbles appear on the surface, then flip and brown on the other side. Serve warm with 100% maple syrup. I like to top mine with sliced banana or strawberries.

Cleanse: Day 7

Day 7:
  • Breakfast: cleanse friendly pancakes with banana and 100% maple syrup and took fiber pills

  • Lunch: Had the last of the corn and bean salad and the last of the rotisserie chicken leftovers from Friday

  • Dinner: Made soup from the chicken carcass, cabbage, green beans, scallions, squash and broccoli from the garden. This made enough soup to put into the fridge for dinner a few nights this upcoming week. So I won't have to cook then!

Entering the last week of the cleanse I don't know that I've really paid much as much attention to what I ate this time as I have in the past. I think I've incorporate a lot of this way of eating into my regular diet. The main think I find it hard to give up during a cleanse is sugar. I love chocolate and like to have some after dinner most days. But I guess by doing these cleanses every so often, I can "make up" for eating chocolate the rest of the time. And although I find eating dried fruit a good way to take care of a sweet craving, a prune is not chocolate!

Cleanse: Day 6

Day 6:

  • Breakfast: steel cut oats with rice milk, raisins and banana and fiber pills
  • Lunch: 2 boiled eggs, corn and bean salad with chicken, and a couple of mini muffins with a drizzle of maple syrup
  • Dinner @ Red Robin: Ordered the Simply delicious chicken sandwich, which is a grilled chicken breast on whole grain bun with lettuce, tomato, onion, and pickle. It came with fries but I substituted a side salad with balsamic vinaigrette. I had hot mint tea to drink.

Friday, October 8, 2010

Cleanse: Day 5

Day 5:

  • Breakfast: cheerios with rice milk and banana and fiber pills
  • Walked all around the zoo today with the kids who had the day off school
  • Lunch: 2 boiled eggs, corn and bean salad, an apple and a couple of mini muffins
  • Snack: several hand fulls of peanuts and raisins
  • Dinner: All bought at PCC on the way home from the zoo. Leg and thigh of a rotisserie chicken, several pieces of brown rice and veggie sushi, bottle of Cha-Dao Japanese green tea

Thursday, October 7, 2010

Cleanse: Day 4

Day 4:
  • Breakfast: cheerios with rice milk and banana and fiber pills
  • 30 minutes on stationary bike
  • Lunch: 2 mini muffins, 1 boiled egg and several handfulls of peanuts and raisins
  • Dinner will probably be bean salsa burritos on whole wheat tortilla with some chicken and a couple of mini muffins for dessert
I made some muffins last night using zucchini, carrot, apple, banana, dried plum puree mixed into a no-sugar whole wheat banana bread recipe. The muffins didn't have any added sweetener and they still turned out ok. I think when I make them again I'll add some maple syrup for sweetener or add more dried plums to the puree.

Wednesday, October 6, 2010

Cleanse: Day 3

Day 3:
  • Had the usual for breakfast, cheerios with banana and rice milk
  • took fiber pills
  • Did an hour on the stationary bike and rode about 10 miles
  • For lunch I had some noodles with veggies and sesame soy dressing and a Jamba juice all fruit and juice smoothie
  • For a snack I had a boiled egg
  • Dinner will probably be corn and bean salad and some grilled chicken

So far the cleanse isn't leaving me feeling deprived of anything. I guess my method is to specifically NOT deprive myself of, say, dessert but to find something that can fill that spot that fits the guidelines of the cleanse. So I'll sometimes make my no sugar banana bread or have apples and natural peanut butter or some dried plums to feed the sweet tooth. If I'm in the mood for comfort food like spaghetti and meatballs, I'll use whole wheat spaghetti, a great sauce and turkey or chicken meatballs. So I eat what I like, but find alternatives that are healthy to replace the not so healthy versions.

Tuesday, October 5, 2010

Cleanse: Day 2

Day 2 of my Detox Cleanse:
  • Breakfast:Ate plain cheerios with a banana and rice milk and took fiber pills
  • Did a 1 hour Body Sculpt Class and 1/2 hour on the stationary bike
  • Lunch: Ate a toasted WW tortilla with hummus and pico de gallo, 1 boiled egg, homemade pickled beets, apple slices, smoothie made with frozen berry mix, banana, peaches, carrot, spinach and apple juice
  • Dinner: Plan to make a soup from my crock veggies from Sunday along with some lentils, soybeans, onions, and maybe chicken.
  • Will take the rest of the cleanse pills (8 total at bed time)

Monday, October 4, 2010

Cleanse: Day 1


Toxins come from food, hair and skin products, polluted air, cleaning products and a variety of other places. Over time they build up in your body and make it harder for your body to function at it's best. By eliminating some of those foods like sugar, caffeine and alcohol, using natural hair, skin and cleaning products, drinking plenty of water and doing exercise you can help your body's natural detoxifying organs to eliminate the toxins from your body.

Today is day 1 of my 2 week cleanse. My intent is to document my cleanse in order to keep myself honest and possibly motivate others to give it a try. Along with eliminating some foods I'm also using a Cleanse kit to aid in the cleansing process. The one I'm using this time is called Whole Body Cleanse. In the past I've used the Advocare Cleanse kit and liked that one as well.

So here goes the documentation!

Day 1:
  • Had plain cheerios with banana and rice milk for breakfast and took the fiber pills from my kit.
  • Went to yoga class.
  • I have a cold and the cough drops I used to get through yoga probably have some form of sugar in them, but I didn’t have a lot of choice. Hopefully tomorrow will be cough drop free.
  • Planning to have a 2 egg, cabbage and sundried tomato omelet for lunch with some peaches. (The eggs and cabbage came from my garden.)
  • Dinner is yet to be decided but will include some carrots, cabbage and rutabaga I cooked in the crock pot yesterday added to some chicken or fish probably. May make some whole wheat or brown rice pasta to go with it, too.

Sunday, September 26, 2010

Harvesting the root veggies


This weekend I decided it was time to pull and dig up my root veggies. Luckily I picked sunny Saturday to spend time in the garden. When I was originally starting my seeds last spring I remember thinking I had a LOT of carrot seedlings. Then as I transplanted the seedlings into the garden I thought again "My, I have a LOT of carrots!" And for the third time, as I'm pulling the suckers out of the ground I remarked again "Good night, I've got a LOT of carrots!" I planted globe and multi-colored varieties; so the pile looks very colorful! I estimate I have about 12 gallons of carrots.


I pulled up all of my remaining beets at the same time and noticed that I did NOT have as many beets as I've had in past years. This year I think I got about 2 gallons of beet. Last year I had more beets than I really needed as evidenced by the 2 jars of pickled beets that are STILL in my fridge from pickling last summer. So I guess a smaller harvest of beets is ok. I also saved the beet greens. They area little tough to eat raw, although we've done it, but cooked with some garlic and parmesean cheese, they are wonderful! I'm going to freeze them for now and eat them at some point in the winter when I want a little taste of summer greens to cheer up a meal.

I dug up my whole row of potatoes and was pretty disappointed by the small number of potatoes that I found. I guess if I look at the investment in those potatoes, I should be happy with what I got. All of this year's seed potatoes came from potatoes that were in my pantry and started growing legs. We're not huge potato eaters, so sometimes they sit in the pantry for a bit too long. The ones I planted were tiny shriveled up little things so I guess if they produced anything at all I should be grateful.

I think the true winner in the garden this year is the rutabaga. One of those guys was as big as a cantalope. I can truly see how they carve those at halloween in England, although I wouldn't really want to try.

If I had to pick one job in the garden/kitchen I hate more than any other it would be washing carrots. My back aches, my mind goes numb and my hands cramp standing at the sink scrubbing all of the dirt off of my gnarled multi-legged carrots. So this year, on the advice of my friend Kathryn, I dumped all of the carrots in a Rubbermaid tote and hosed them down a few times. That seemed to do a pretty good job, but they'll still need a little scrubbing when I bring them in to eat. Right now they are drying on newspaper in my garage. I read that you can store carrots in boxes layered with newspaper and plan to give that a try this year. I have way too many to put in the crisper, so it'll have to go with it. Now to go look up carrot recipes!

Tuesday, September 14, 2010

A somewhat disappointing year in the garden

In past years our 1800 square foot garden along with our fruit trees has provided all of the fruits and veggies my family ate (except for bananas, which are a staple around here and something I obviously can't grow in this climate). This year, however, was very disappointing. The weather was uncharacteristically cool almost all summer punctuated by a week here and there of very hot weather. My veggies got very confused by this and did all sorts of strange things.

First, at the very beginning of June my spinach bolted. The weather hadn't reached 70 yet and my spinach decided it was time to flower and go to seed. I pulled up the first batch and replanted another crop. The second crop did much better and was very yummy. I then planted another crop around the middle of august, and that one is just barely coming up now. Maybe it will produce something in the fall if it doesn't get too cold too soon.

Second, my beets bolted! My mother in law, who is an expert gardener, said she'd never seen beets bolt within a single season. A beet is a biennial plant meaning it would flower in it's second summer if you didn't pull it up at the end of its first season to eat the root. These beets were planted in May of this year and shouldn't have been flowering this year. I assume the cold/hot/cold/hot weather of this summer made the beets think they'd lived through a full 15-18 months of life rather than the 3-4 that they really lived. Beets are usually my fool proof plant that will grow and do well no matter what, but I guess that's not the case this year.

Third, my beans didn't produce anything until well into August of this year. I'm used to getting some green beans by July anyway, and then throughout the rest of the summer until early October. So, I'm expecting the total yield for beans this year to be very low.

Fourth, my corn acted very strangely this year as well. It grew fairly tall and started to put out tassels on top, but then I noticed that the ears hadn't formed at all yet and there were no silks for all of that pollen on the tassels to pollinate. Luckily we had a few days of warm weather in there and a few ears did form. Hopefully the pollen made its way to the silks, but i won't know that until I tear open a few husks and see what's inside.

I guess with any kind of farming or gardening the gardener and the crops are at the mercy of the weather. Any year may be good or bad depending on how much sun and warmth your little plants get. Maybe next year I'll try some row covers or come cloches to warm up the plants even if the weather isn't warm. It's all an experiment; sometimes the experiment works as hoped and sometimes it doesn't.

Sunday, September 12, 2010

Steamed Red Bean Buns


When we were eating at the revolving sushi restaurant the other day my daughter realized that she really liked the red bean paste inside of the sesame balls. She didn't really like the sesame seed and rice flour coating, but the bean paste was a hit. So I got to thinking that maybe I could make red bean paste. I'm always looking for ways to get more protein into my kids' diets, and this seemed like it might be an acceptable way to add a bit. I looked around online and found a few recipes that had basically the same directions. So I gave it a try.


Red Bean Paste
Ingredients:
2/3 C Small red Adzuki beans (although I'm not sure why you couldn't use any type of beans)
Water
1/2 C sugar

Directions:
1. Soak dried beans in several cups of water overnight.
2. After soaking, put soaked beans and soaking water in a saucepan, bring to a boil and then simmer for about 1.5 hours stiring occasionally and adding more water when needed.
3. After beans have cooked until they are very tender transfer beans and a small amount of water to the blender, add sugar and blend until smooth.
4. If mixture is still very liquid, transfer to a microwave safe bowl and microwave for a few minuted until water has reduced and you are left with a paste.

Once I had the paste I got inspired to make the buns that go with the red bean paste. So once again I turned to my trusty friend the internet and found a few different steamed bun recipes. Here is what I made.


Red Bean Buns
Ingredients:
Red Bean Paste
3 C flour (recipe called for AP but I used WW)
1/2 tsp baking powder
1/2 C sugar
1.5 tsp active dry yeast
1/2 C warm water
1/2 C milk
1 T butter

Directions:
1. Add yeast to warm water and let sit for about 10 minutes.
2. Meanwhile combine flour, sugar, baking powder in a bowl.
3. Cut in the butter then add the milk and yeast mixture to the dry ingredients.
4. Mix dough and knead for a few minutes adding extra water or extra flour as needed.
5. Form into a ball in your bowl, cover with a damp towel then let rise for about an hour.
6. After dough has risen, separate into about 12 equal sized balls.
7. Fill a large stock pot with a steamer basket, add water until it is just under the steamer basket then with the lid on bring to a boil.
8. Line the steamer basket with parchment paper and keep this basket out of the pot for now.
9. Take your dough balls and flatten each into a disk, then put a Tbs of bean paste into the center of the disk and seal the dough around it forming a bun shape.
10. Put a few of these formed buns into the steamer basket seam side down, put the basket into the pot of boiling water and cover with the lid. Steam the buns for 12 minutes then remove to a plate to cool.

My Red Bean Buns don't look like the ones you get at Dim Sum most likely because I used whole wheat flour and butter rather than AP flour and shortening. But the result turned out very yummy. We ate our treats by dipping the bun into the left over bean paste to get even more yummy goodness into each bite. :) Enjoy!

Two recipes I've borrowed and loved

I wanted to put a post in here to point you to 2 yummy veggie dishes I've tried recently and LOVED! When I'd gathered a few zucchini from the garden and wanted something yummy to make from it other than zucchini bread I tried this Garden Chowder recipe reposted by Stephanie at My Mental Amalgam. I used as many veggies from the garden as I could find and it was fabulous! I'm used to broth based soups so it was nice to have a chowder for a change.

Another one reposted by Stephanie that I made the other day was Lemony Kale Chips. Mine didn't really get crispy throughout, but they were very good, and I'd definitely make them again.

Thanks Stephanie!
Sunday, August 22, 2010

An Experimental Gardener: The early years


I classify myself as an Experimental Gardener. I was never around a home garden when I was a child. My house was surrounded on almost all sides by large rice, bean, wheat or corn fields. But to me that was farming, not gardening, and for some reason the two didn't seem even remotely related. My house didn't even have a flower garden or a few flowers planted around the house for color. In the summer my family was constantly getting large bags of cucumbers and tomatoes from neighbors with overflowing gardens. So I did get to experience the taste of fresh veggies straight from the vine and knew that they were far superior to anything you could buy in the grocery store. But I never got to help plant seeds or start seedlings or harvest that first ripe tomato of the season. I never got to experience the joy of creating food from almost nothing.


My first experience with a vegetable garden came no more than 7 or 8 years ago when I decided I'd fill in a bare place in my flower garden with a cucumber and a zucchini plant. Looking back on it I now realize that the soil in that garden was horrible. It was a light beige color and probably had very little organic material in it at all. But I planted my starts that I bought at Lowe's or Home Depot, watered them well and waited. The space in which these starts were planted did get a fair amount of sun fortunately. I really had no idea what to do with a plant start other than water it and wait. I didn't amend the soil with compost or even fertilize the plant, but low and behold a couple of little pickle sized cucumbers did grow on that plant. The zucchini plant, however, didn't do a darn thing. Not a single zucchini grew on that plant to the shock of some of my gardener friends. For them, zucchini multiply like bunnies to the extent that they will sneak them onto friend's doorsteps just to get rid of them. But for me, nada. Looking back on it I realize that the state of the soil was most likely the reason for the lack of fruit on my zucchini plant. Zucchini like to grow in compost piles or nearly so. That sandy beige soil held no nutrients that the zucchini needed to set fruit or even produce flowers.


I never really tried to plant vegetables in that garden again, but when we moved to our new house with a bit of land set aside for a garden I tried again. That first garden plot was about 10 feet by 10 feet and wasn't really in the best spot for sun, but I planted some seeds and starts the first year we moved into our house and to my surprise vegetables grew! I planted pole beans next to a couple of poles already set beside the garden, planted 2 zucchini starts, 2 cucumber starts, 4 lettuce starts, a packet of carrot seeds and a packet of pumpkin seeds. The zucchini, cucumber and pole beans did fantastically well compared to my previous attempts, but the lettuce was mostly eaten my bunnies and slugs. My carrots came up in neat little rows, but I am horrible at thinning! I don't have the heart to kill those little plants by pulling some of them up to make room for others to grow. So my carrots were really too crowded to grow that year. (I now start my carrots in pots and transplant every single little start into its own space in my garden. According to the "experts" you can't transplant carrots, but I tried it and it worked.)


My pumpkins were another mystery to me. I still hadn't figured out that the soil in our other garden had not been good. So I didn't think about the soil in this garden much either. The soil was better here, but I could have done more to make it better. As the years went on, I did amend the soil with compost, leaves, grass clippings, etc. but at this point we had the soil that came with the house. I also didn't know the difference between a female flower and a male flower on a squash plant. So when my pumpkin plants started to grow and produce these lovely yellow flowers I thought I'd have a bumper crop of pumpkins. But the flowers kept coming and no pumpkins appeared. All summer long I'd water the garden and peek under all of the pumpkin leaves only to find nothing resembling a pumpkin. Again, hindsight being 20/20, I realize that I never had a female flower on those plants. I'm not sure why that was; the next year my pumpkins did very well and I had several pumpkins to carve and to eat.


All in all, that first real year of gardening taught me a lot. I learned that if you want to grow lettuce you have to put up a fence and lay out slug bait (or get chickens), most veggies need a lot of sun -- more than that garden position would give, and soil needs yearly amendment of organic material. In later years I've learned a lot more helpful tidbits, but it's all experimentation. One thing I've learned is that ignorance of the "right way" to do something often leads to a better way to do it or at least a better way for you.

Wednesday, July 28, 2010

The garden so far

This summer has been a very challenging gardening experience. The weather here was cold and rainy until well into July. That's left the garden at least a month behind in it's growth cycle. Some things just didn't grow at all this year like the golden apples on my apple tree. And some things are very behind, like the rest of the garden.

So far I've been able to harvest a couple handfuls of red strawberries and a couple handfuls of white Alpine strawberries. The white ones are still producing a few berries every week and the red Ever bearing varieties will probably come back and produce some more later in the summer. I've harvested some lettuce, but it's now bolted. My first round of spinach started in the greenhouse bolted very early before I could harvest it and since the temperatures at the time were in the 50's I have no idea why it did. But my second planting, which went directly into the garden has done pretty well. We ate some of it the other day.

I planted some peas this year as I do every year and then threw away the seed packet. When the peas started producing decent sized pods I picked them and put them into a salad to eat. The pods were so stringy and tough we just couldn't eat them. In past years I've had no problem with my snap peas being tough. Hubby asked me what variety I planted and I had no idea. I'm not very good at keeping track of that kind of thing when it comes to my garden. But that got us thinking that maybe I'd planted shelling peas. To test the theory I let them grow and mature more before I picked more of them. Yesterday I brought in a decent sized bowl full of pea pods, shelled them and had a small bowl full of peas! They tasted great, so I guess I planted shelling peas. I'll have to read the packet more carefully next time. :)

There are a few other veggies in the garden that are growing but not quickly. I've got broccoli that I could probably cut next week and I've got little bitty pickles and yellow squash on their vines. The Pumpkin patch, which was planted in straight compost, seems to be producing something but the little female flowers look they are attached to zucchini or some strange long skinny pumpkin rather than a round one. I guess I'll see what comes of it.
The carrots, beats, soybeans, corn, rutabaga, parsnips, potatoes, and pole beans are growing as well, but there's nothing to harvest there yet. I planted artichoke and okra as a test this year to see if I could do it, but the weather has made this year a bad year to test things. They are growing but aren't very tall yet. Not sure if they'll produce anything. And last but not least the 4 tomato plants I bought and planted have flowers! Maybe I'll have some tomatoes this year. I planted them in pots and have them sitting next to the greenhouse in as full a sun as I have. We'll see what happens.


Tuesday, July 27, 2010

Make your own Kettle Corn


My daughter LOVES Kettle corn and wants to buy the huge $7 bags every time we go to the farmer's market. I don't buy it very often, but she would eat the whole bag by herself if I did. So I got to thinking that maybe I could make Kettle corn on my own using the popcorn that was already in my pantry. I've made 2 batches so far and they've been a hit both times. Even my son ate some and he's not a popcorn fan normally. I have no idea how much homemade kettle corn costs, but it can't be much more than 50 cents per batch. I found a recipe online and used that the first time, but last night I couldn't find it so I just "winged" it, and Hubby liked this batch better than the rest.


Homemade Kettle Corn

Ingredients:
1/4 cup popping corn
2 Tbs oil (I used vegetable oil)
2 Tbs sugar
1 tsp salt
2 tsp cinnamon (optional, but my family loves it this way)

Directions:
Mix sugar, salt and cinnamon in a small bowl or mixing cup. Put oil and corn in a fairly deep skillet (mine is almost wok-like) and heat on medium heat until oil starts to bubble. At this point put the lid on the skillet. When you hear the first few pops shake the skillet with the lid on to move the corn around in the pan (like you've seen people do when they make popcorn). When most of the corn has popped sprinkle the sugar mixture over the corn, replace the lid and shake some more. Heat for a few seconds more until all corn has popped then remove from heat and enjoy!

Monday, July 26, 2010

My new favorite bread and pizza dough recipe


I've been reading about artisan bread and loved how easy it sounded to make and use over a couple of weeks. According to a couple of books I read you don't knead artisan bread or proof your yeast, and you can refrigerate it for up to 2 weeks while using a portion when you want to use it. I made a batch of 50/50 whole wheat and AP flour dough the other day and made 2 six inch round loaves and a 12 inch pizza crust from it. I put the rest, which is probably one 6 to 8 inch loaf's worth, into the fridge to age. Apparently the longer it stays in the fridge the more flavor it acquires. Here's the recipe I used.

Artisan bread basic recipe
Ingredients:
2 tsp yeast (I used active dry yeast)
3 tsp salt
3 C warm water (about 100 degrees. too hot will kill the yeast)
3 C AP flour
3.5 C Whole Wheat flour

Directions:
Dissolve yeast and salt in warm water. Mix flours in a container with a lid (not air tight) then add water mixture to flour. Mix until all flour is incorporated, about 50 strokes. Let the dough sit at room temperature covered for at least 2 hours. You can let it sit for up to 5 hours if need be. At this point you can refrigerate to use the dough at a later time or can use it right away. When you are ready to use dough sprinkle the dough in the container and your hands with a dusting of flour so you can handle the soft wet dough. Quickly shape into whatever shape you want by stretching the dough into a ball or oval with the ends on the bottom. If you're making pizza crust stretch dough into a flat disk using a rolling pin if needed. Sprinkle a flexible cutting mat with corn meal then put shaped dough on mat to rest for about 40 minutes. 20 minutes into resting turn on your oven to 400 degrees and place a pizza stone in the oven. On another rack place a pan of water. After 20 minutes take a serrated knife and cut an X or a few slits into the dough then slide your dough onto the hot pizza stone from your mat. Bake for about 30 minutes until the crust is nicely browned.

Wednesday, July 7, 2010

Chocolate Pudding

I bought a food dehydrator a few weeks ago. Ever since then I've been looking for neat things to make with it. I've dried strawberries, bananas, cherries, oranges, made my own fruit leather and made some cookies. (Dehydrator post coming soon) While searching for these recipes and ideas I've stumbled across a few Raw Food diet books that have some interesting recipes. Yesterday while the kids and I were sitting outside on the deck reading I found a recipe for raw vegan chocolate pudding. There was no cooking or waiting involved so it seemed like a good treat to make right away. Although anything vegan might not sound too yummy to you, it actually turned out really good. And with the healthy ingredients I'll definitely make it again. The kids gobbled it up!

Healthy Chocolate Pudding

Ingredients:

1/2 C raw almonds (I used mixed nuts)

2 peeled bananas

3 Tbs Cocoa or Carob powder

1/2 C dried plums or dates soaked in 1/2 C water for 15 minutes


Directions:

Combine all ingredients in a blender and puree until smooth.

Monday, July 5, 2010

Granola Bars - Take 4

My search for the perfect granola bar has been interesting and mostly yummy. Granola bar #1 was too cakey for a granola bar but good for muffins, #2 was like a peanut butter cookie, #3 tasted too healthy :). So, after much testing and tasting attempt #4 is the winner. This granola bar is adaptable to whatever mix-ins you prefer from chocolate chips, raisins, shredded coconut, nuts, marshmallows, etc. The recipe below is the one that my kids (hubby and I, too) liked best.


Chocolate chip granola bars
Ingredients:
1/3 C brown sugar
2/3 C natural Peanut butter
1/2 C Honey
1/2 C applesauce
2 tsp vanilla
1.5 C Oats
1.5 C Brown rice cereal
1 C chocolate chips
1/2 C shredded unsweetened coconut
1/3 C flax seed meal
1/3 C wheat bran
1/3 C wheat germ


Directions:
Mix all ingredients and press into a greased cookie sheet. Bake for about 30-40 minutes at 350 then cut into granola bar shapes.

Homemade Cheese-it/Goldfish crackers


I went looking for a cheesy cracker recipe to replace the goldfish crackers my kids love and found one that I've modified a bit to make it more healthy. I don't have a fish cracker mold, but my kids seem ok with square cheese-it shaped ones. :)

Cheesy Crackers
Ingredients:
2 C whole wheat flour
1/2 tsp salt
1/2 C grated Parmesan cheese (use the real stuff if you can)
4 Tbs butter
2 Tbs sweet potato puree (to give it more orange color and add more healthy stuff)
1/4 C cream or half and half

Directions:
Preheat oven to 400 degrees and grease cookie sheet. Mix butter, sweet potato puree, cream, butter, salt and cheese in a bowl. When combined, slowly add flour until a dough forms. Roll out dough on a floured surface. Roll as thin as you can - no more than 1/4 inch thick; the thinner the better. Place rolled out dough onto cookie sheet and cut into squares with a pizza cutter. The farther apart on the tray the crackers are cooked the crisper they will be. Bake for 15 minutes then check for doneness on the edge crackers. The crackers on the edge may be cooked before the ones in the middle are crisp. Remove those crisp ones and keep cooking the middle crackers until they reach the desired crispness.

Wednesday, June 23, 2010

Granola/Energy Bars - Take 2


The first set of energy bars I made were very cakey so I looked around to find ones that were more chewy. I found this one on Allrecipes.com and altered it to fit what we had in the pantry. I'm going to keep looking around and experimenting, though, until I find one that is like the chewy granola bars you buy in the store. Enjoy!


Granola Energy Bars
These bars are a foundation to create your own granola bars to your liking. The original recipe called for raisins, toasted sesame seeds & sunflower seeds, but my kids don't like those things, so I substituted some less healthy things in small quantity to make them seem more like a cookie. I'm going to try to slip in some grains, seeds and dried fruit that I've run through the blender next time. Chocolate chips may be mixed in or sprinkled on top of bars, melted and spread over bars in last 10 minutes of cooking.

Ingredients:
3 C oats
1/2 C wheat or oat bran
1/2 C Wheat germ
1/2 C flax seed meal
1 C Chocolate chips
1 tsp salt
2 tsp cinnamon
1 C honey
1 C Peanut butter
1/2 C apple sauce

Directions:
Mix Oats, bran, wheat germ, flax seed, salt, cinnamon, chocolate chips (if mixing in) and any other nuts, seeds, or dried fruit you are adding together in a large bowl. mix honey, peanut butter and applesauce in a separate bowl. Add wet to dry and mix. Press dough into a 1/2 sheet pan covered in parchment paper or well greased. If putting chocolate on top, sprinkle chips onto bars in last 10 minutes of cooking and spread on top when chips are melted. Bake at 350 degrees for about 25 minutes.

Tuesday, June 15, 2010

Kid Friendly Energy bars and Cheese Souffle

I saw a friend's post the other day about making your own energy bars and wanted to give it a try. The original recipe can be found here, but I made a couple of changes. I was hoping they would be granola bar chewy but they really turned out more cakey. Hubby toasted one and said it made the outside crispy but the inside was still moist.


Homemade Healthy Energy Bars
Ingredients:
•1 1⁄2 cups whole wheat flour
•3⁄4 cup flaxseed meal
•3⁄4 cup wheat bran
•2 tsp. baking soda
•1 tsp. baking powder
•1⁄2 tsp. salt
•2 tsp. cinnamon
•1⁄2 tsp. allspice
•1 Tbs. cocoa powder
•1 1⁄2 cups carrots, shredded
•1 1⁄2 cups apples, cored and shredded
•1 cup mixed nuts finely chopped
•3 eggs, slightly beaten
•1 cup applesauce
•1⁄4 cup honey
•1 tsp. vanilla extract

Preparation:
Stir together dry ingredients.
Add carrots, apples, nuts, and stir well.
In a separate bowl, combine eggs , applesauce, honey and vanilla. Add to flour mixture and stir just until ingredients are moistened.
Spray a half sheet pan with cooking spray then add batter spreading evenly over entire pan.
Bake in a 350-degree F oven for 25-40 minutes. cut into squares. Makes 32 2-inch squares.


The same night I made the energy bars I didn't really want to make a big dinner so I found a recipe for a healthy cheese souffle that included veggie puree. We called these cheese puffs and both kids ate them! With a serving of veggies, protein from the eggs and whole wheat flour, each serving of these cheesy puffs is a meal for a child.


Healthy Cheesey Puffs
Ingredients:
3 eggs
3 egg whites
1/2 C veggie puree (I used sweet potato puree - don't peel the sweet potatoes.)
2 T shredded cheese (I used a blend, but cheddar would be great.)
1/2 tsp baking powder
2 Tbs whole wheat flour
1/4 tsp salt

Preparation:
Preheat oven to 400 degrees and coat 4 ramekins or small glass bowls with cooking spray. Mix all ingredients and pour into ramekins. Put ramekins on baking sheet and bake for about 15 minutes or until the puffs are puffed.

Monday, June 14, 2010

Sourdough bread

After I started making some of my family's bread, I wanted to try making sourdough. I looked up some recipes on AllRecipes.com and found that most recipes required Sourdough starter. I had no idea what that was so I looked that up as well. Turns out that Sourdough starter is simply a mixture of flour water and yeast that you let sit in a warm place until it "sours". As I kept reading I found that you really don't need the yeast in the mixture at all, and can "collect" natural yeasts from the air to inoculate your mixture. In earlier times when yeast in a bottle or packet wasn't available, people would make this starter to allow them to make yeast bread. I didn't really want to wait to collect natural yeast so I added my own. I put a cup of flour, a cup of warm water and 1.5 tsp of yeast into a glass jar, mixed it up then put it on a plate in the oven with just the oven light on. The light warmed the oven enough to keep the whole mixture at a good temperature for the 5 days it needed to sour. After a few days the mixture smelled a lot like sourdough so I thought I'd give bread a try. I found a recipe for a simple sourdough bread for a bread machine and modified it to use an oven.

Simple Sourdough Bread
3/4 Warm water
1.5 tsp active dry yeast
1 tsp sugar
1 C sourdough starter
1.5 tsp salt
2.5 C Whole Wheat flour
Directions:
1. Add sugar and yeast to warm water and let bloom for about 10 minutes
2. Add yeast mixture to starter then add Flour and salt to wet ingredients.
3. knead for about 5-10 minutes until dough is elastic. form into a ball and put into a greased bowl. cover with towel and let sit for an hour or 2 until dough has doubled.
4. punch dough down, form into loaves, rolls or other shapes and put onto greased pizza stone or cookie sheet.
5. bake for about 30-45 minutes in 350 degree oven.
To go with our sourdough bread we had some of the miner's lettuce from the garden, which was very yummy. This lettuce is very tender and has a mild flavor. According to the seed packet it also contains a lot of Vitamin C.
And to top that off we had Linkshire sausage from http://properbritishbacon.com/. Yum!

Sunday, June 13, 2010

Pictures of Flowers and plants around the yard


Bees love Chive flowers!


My HUGE strawberries! I moved the strawberries from pots to the garden last spring. They Love the garden apparently. They are sending out baby runners all over the place making new plants and producing the biggest strawberries I've ever had. Now they just need to get enough sun to turn red...


Red Beets. I planted golden ones as well, but they aren't as far along as the red ones. Beet greens are yummy, too.


Cabbage.


Soybean sprout in the corn rows. Soybeans add nitrogen to the soil and the corn needs extra nitrogen.


Corn sprouts!


The Rhubarb has perked up a lot! I think in about a week I'll have enough for a pie or crisp.


Row of potatoes. I planted baking potatoes and fingerling. The fingerlings are yellow, red and purple.


Miner's lettuce! We ate some for dinner last night and it's really yummy. Turns out that each plant grew a ton of these little flower/leaves. so 2 plants worth of leaves were more than enough for a dinner salad. I've heard that they self propogate if you let them, so I guess I'll have a miner's lettuce corner to my garden next year.


Hens and chicks along the front rock wall.


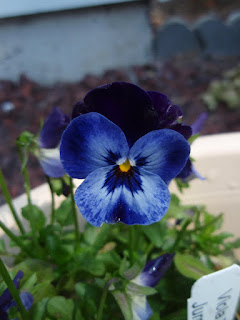
Pansy in a planter.


I got some Columbine babies last year from a friend. This year they are blooming like crazy.


My first Iris! I planted these about 2 years ago and have never had a flower, but this year the
waiting paid off.


Sunday, June 6, 2010

Canning Jam, Jelly, Salsa and Chutney


Canning is something that I've wanted to try for quite a while. For the past several years I've pickled cukes and beets and had them taking up space in my fridge for most of a year. That worked ok, but being able to put them in the pantry would be much nicer. So when I saw that House Party was looking for hosts for a Ball Canning Party, I applied and was chosen. They sent me a water bath canner, a canning discovery kit, about 20 boxes of pectin, canning tools like a lid lifter and bottle tongs and coupons for 4 cases of canning jars. With all that I had more than enough supplies to make a lot of canned food. To learn to use the canner, I made pepper jelly the weekend ahead. The coordination of washing jars, cooking food, simmering lids and processing the cans was a bit of a chaotic dance, but hubby and I got it made.

For the Canning Party I invited some friends over to help with with the chopping and processing... and chatting and laughing. My only issue with the House Party is their invite tool, which seemed to send a lot of invites either into people's spam folders or into never never land. (so if you didn't get an email invite and you live close by it probably went into your spam folder, but we'll do it again in summer and anyone who's interested is invited. ) But even with half of the invites getting lost we had enough people to make Salsa, Strawberry jam and apple chutney. The apple chutney was made ahead and brought by a friend, then we canned it at the party. The Salsa and jam were both made start to finish at the party.

Water bath canning can be used to preserve any high-acid food like pickles, tomato sauces, fruit jams and jellies and the like. Anything that's not high acid must be processed in a pressure canner. That always sounded really intimidating to me. Although water bath canning seemed intimidating as well, and it was a timing challenge but not really hard.

So the basic process for water bath canning is this:

1. run your jars - not lids and bands - through the dishwasher sanitize cycle.
2. hand wash lids and rings in warm soapy water
3. simmer lids but not rings in near boiling water - about 180 degrees while doing everything else.
4. fill your canner or big pot with water half way to the top (make sure that jars submerged in water are covered by water by 1 to 2 inches) and bring to a boil.
5. prepare your recipe. Core, peal, chop veggies and fruits and cook according to recipe directions until mixture is at a boil.
6. When jars are washed and still hot, canner water is boiling, lids are at a simmer and recipe is boiling ladle recipe into warm jars.
7. after filling jars wipe rims with a wet towel then put lids and rings on jars.
8. put sealed jars into boiling canner water and submerge
9. boil for 15 minutes or whatever your canning recipe tells you. The smaller the jar the less time you need to process. 15 minutes was the recommended time for an 8 oz jar.
10. Remove jars from water and sit upright on the counter. When you hear the POP of each lid and can not push lids down with your finger they are sealed.

The recipe for the strawberry jam came from the inside of the pectin box. It was basically 6 Cups of hulled and crushed strawberries, 4 Cups of sugar and a box of pectin. The pepper jelly recipe and the salsa recipe came from the House Party - Ball Taste of Summer site, but I'm sure finding recipes for these would be easy online.
Now I'm just looking around for things to can. I know I'll make all kinds of pickles this summer, and from the look of the strawberry plants in my garden, maybe I'll make some jam from my own garden fruit! Happy Canning!

LinkWithin

Related Posts Plugin for WordPress, Blogger...